Tenant and assistant
What a tenant is, the five-step assistant and when you need several.
Setting it up takes a few minutes. Have your tax firm's advisor and client number ready, and the accounts your tax advisor specifies.
Install the plugin from the Shopware Store and open Orders › DATEV export in the administration. The entry point is the dashboard: for each tenant it shows whether it is ready, what was exported last and what is waiting for the next run.
your-shop.com/admin
Clients
Most urgent first. Clicking a row shows that client in the cards below.
| Client | Readiness | Last export | Waiting | Schedule |
|---|---|---|---|---|
| Muster Retail GmbHClient no. 55002 | Notices · 1 | none yet | 72all documents | Dailynext: 15.09.2026 |
| Muster Handels GmbHClient no. 55001 | Ready | 15.09.202601.08.2026 - 31.08.2026 | 0since 01.09.2026 | Monthlynothing due |
| Muster Digital UGClient no. 55003 | Ready | none yet | 0all documents | Offruns by hand only |
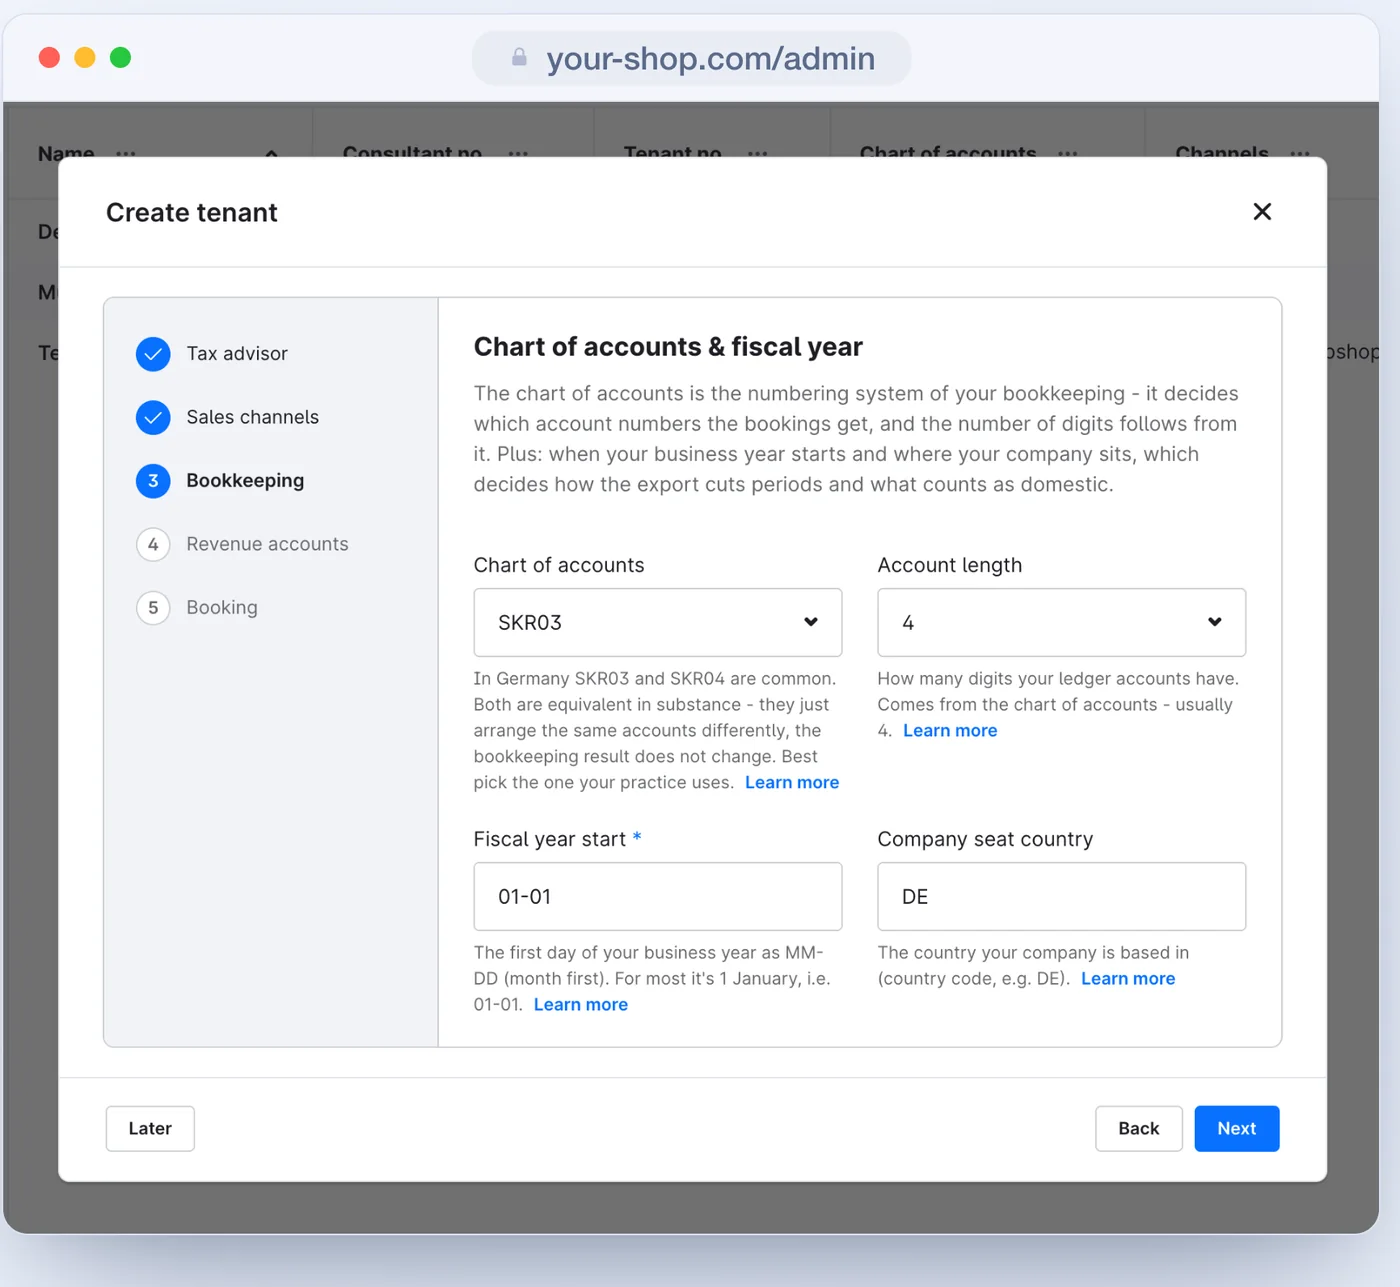
A tenant corresponds to one client at DATEV. The assistant asks for what DATEV needs in five steps: the tax firm with advisor and client number, the sales channels, bookkeeping with chart of accounts, fiscal year, account length and country, the revenue accounts and the booking method. Below every field it says what it does and what is usual; everything can be changed later.
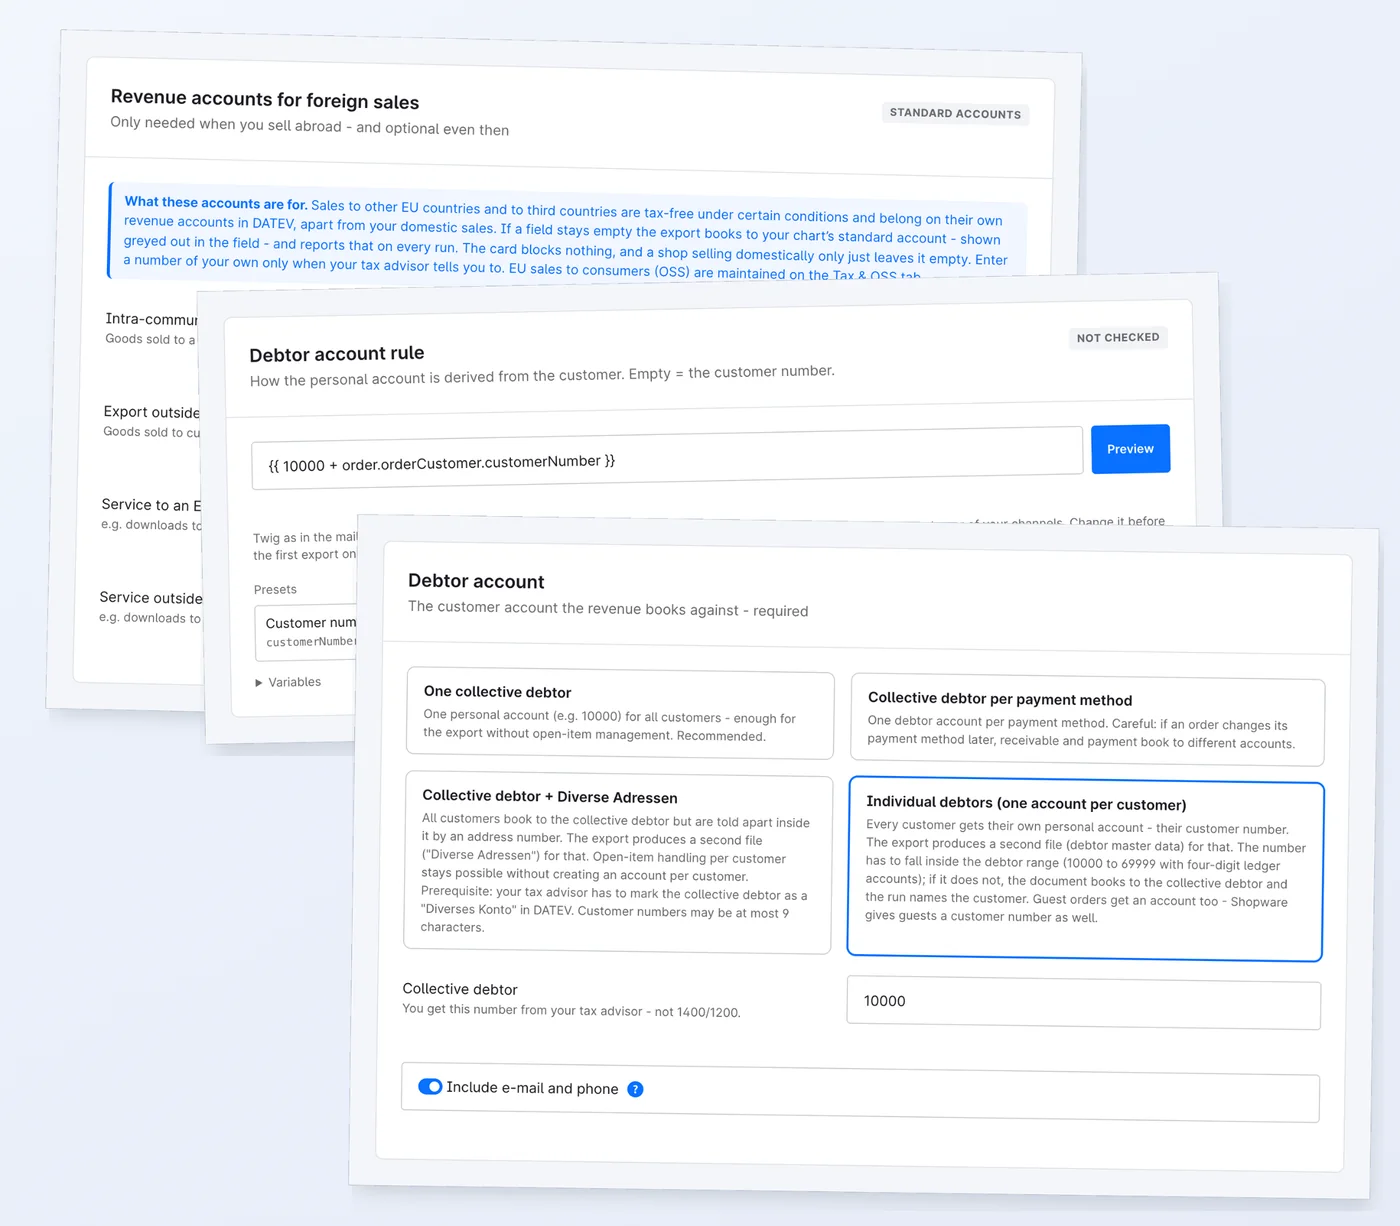
On the Accounts tab you set the revenue accounts per tax rate, the cash accounts per payment method and the debtor account. For the revenue accounts DATEV's standard accounts for SKR03 or SKR04 are suggested; debtor and cash accounts come from your tax firm.
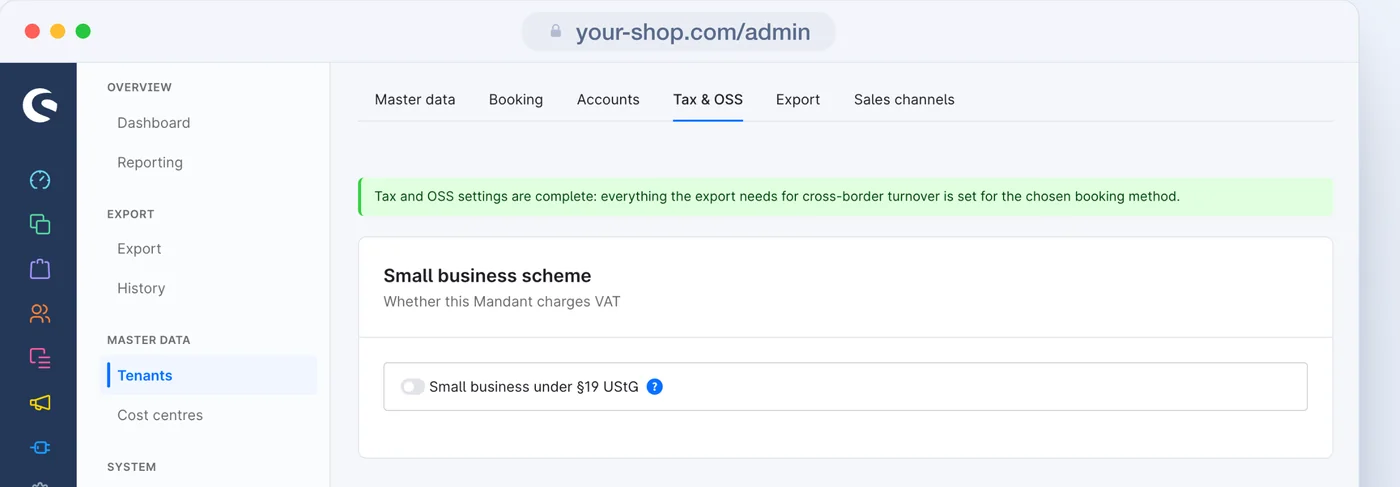
If you use the One-Stop-Shop scheme, you switch on "OSS procedure active" on the Tax & OSS tab and enter one revenue account per destination country - or you use a collective account with a tax key. Both ways exist separately for goods and for electronic services. The tax rates come from your tax rules in Shopware. Without OSS the export books EU sales to private customers at the German rate like domestic sales.
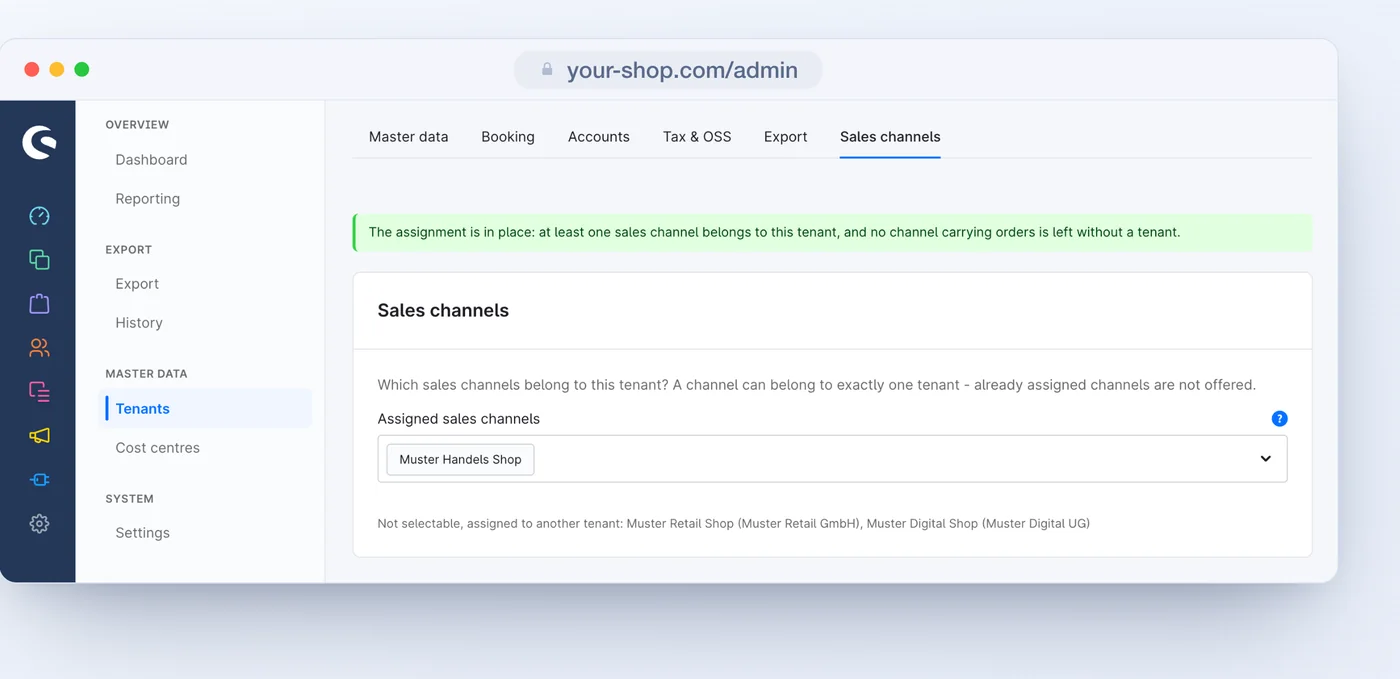
You picked the channels in the assistant; the Sales channels tab is where you change them later. A tenant exports exactly the sales channels that belong to it, and a channel belongs to exactly one tenant. Several companies in one shop each get a tenant of their own.
The readiness card on the dashboard lists what is still missing before the first export - an advisor number, a revenue account, a channel - and links straight to the place where you add it.
your-shop.com/admin
Readiness · Muster Handels GmbH
Blockers: 1 · hints: 0What the next export needs - every line links to the fix.
Tenant configuredConsultant no. 12345
Sales channel assignedChannels: 2
No revenue account for the tax rate 7 %. Documents with that rate cannot be booked - your tax advisor knows which account is right.Open tenant
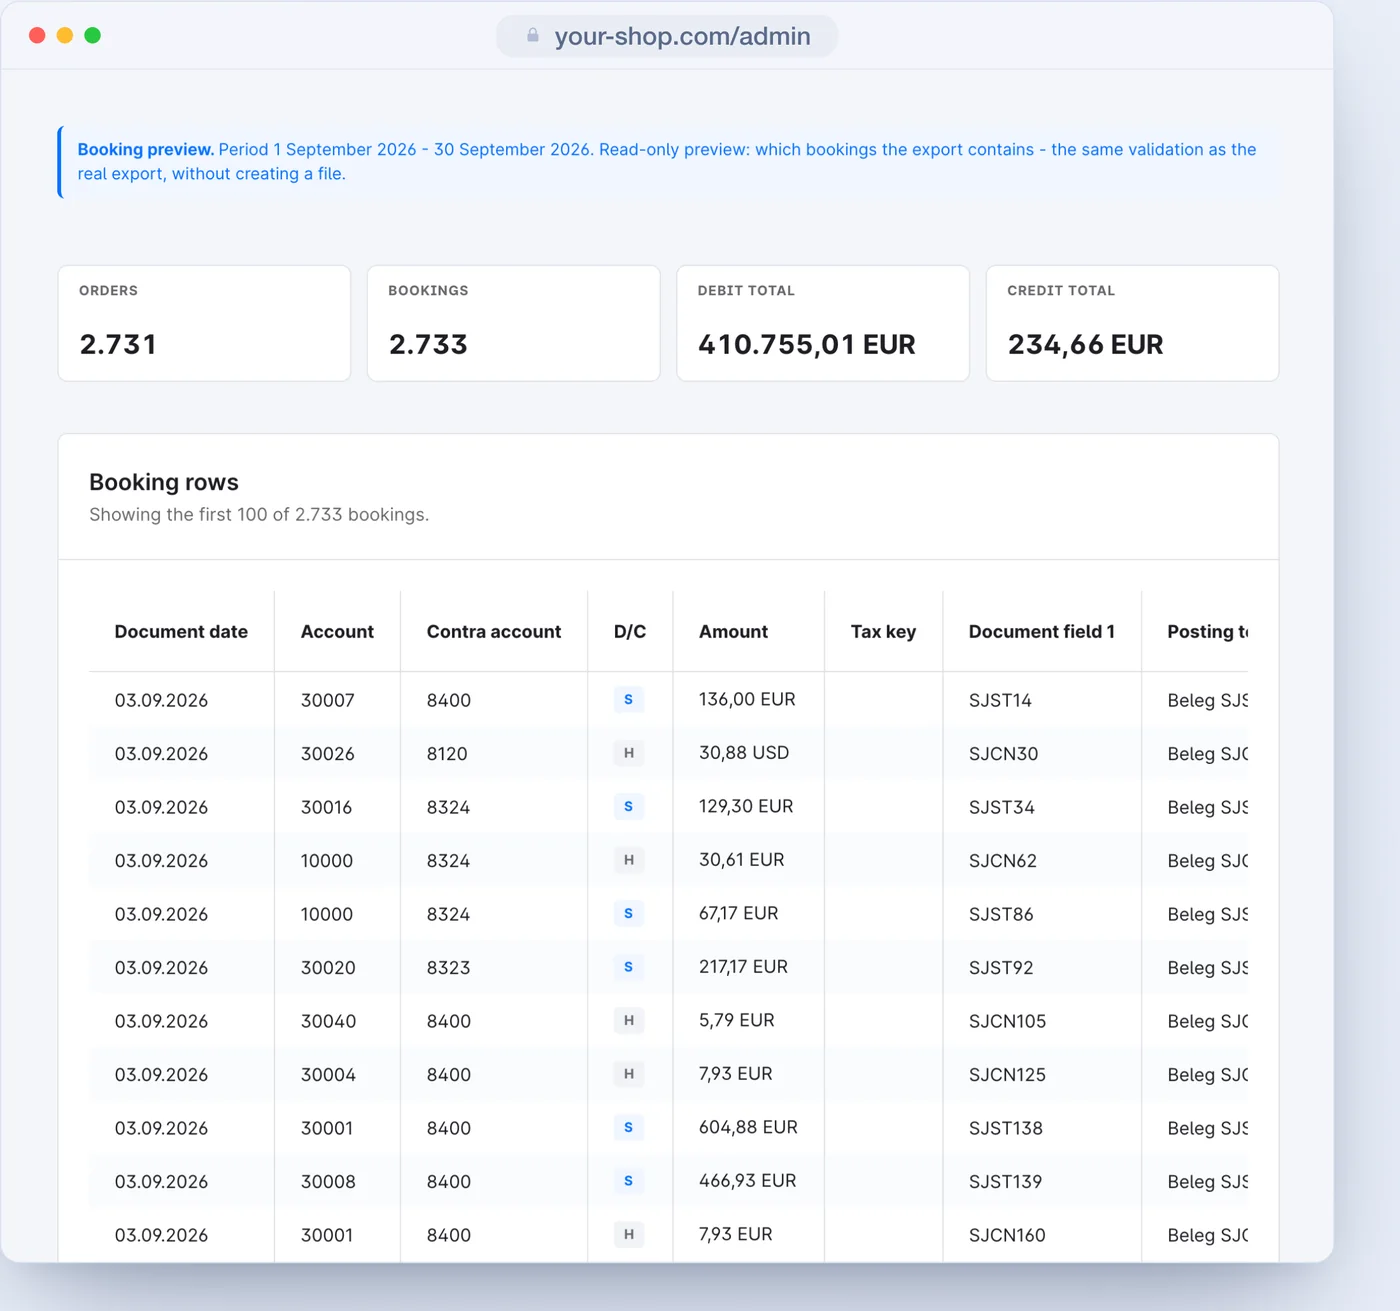
On the Export page you pick the period - last month, current month or custom - and run the preview: documents, bookings and totals without a file being created. Then the test export: a real, complete file that locks nothing and can be repeated as often as needed.
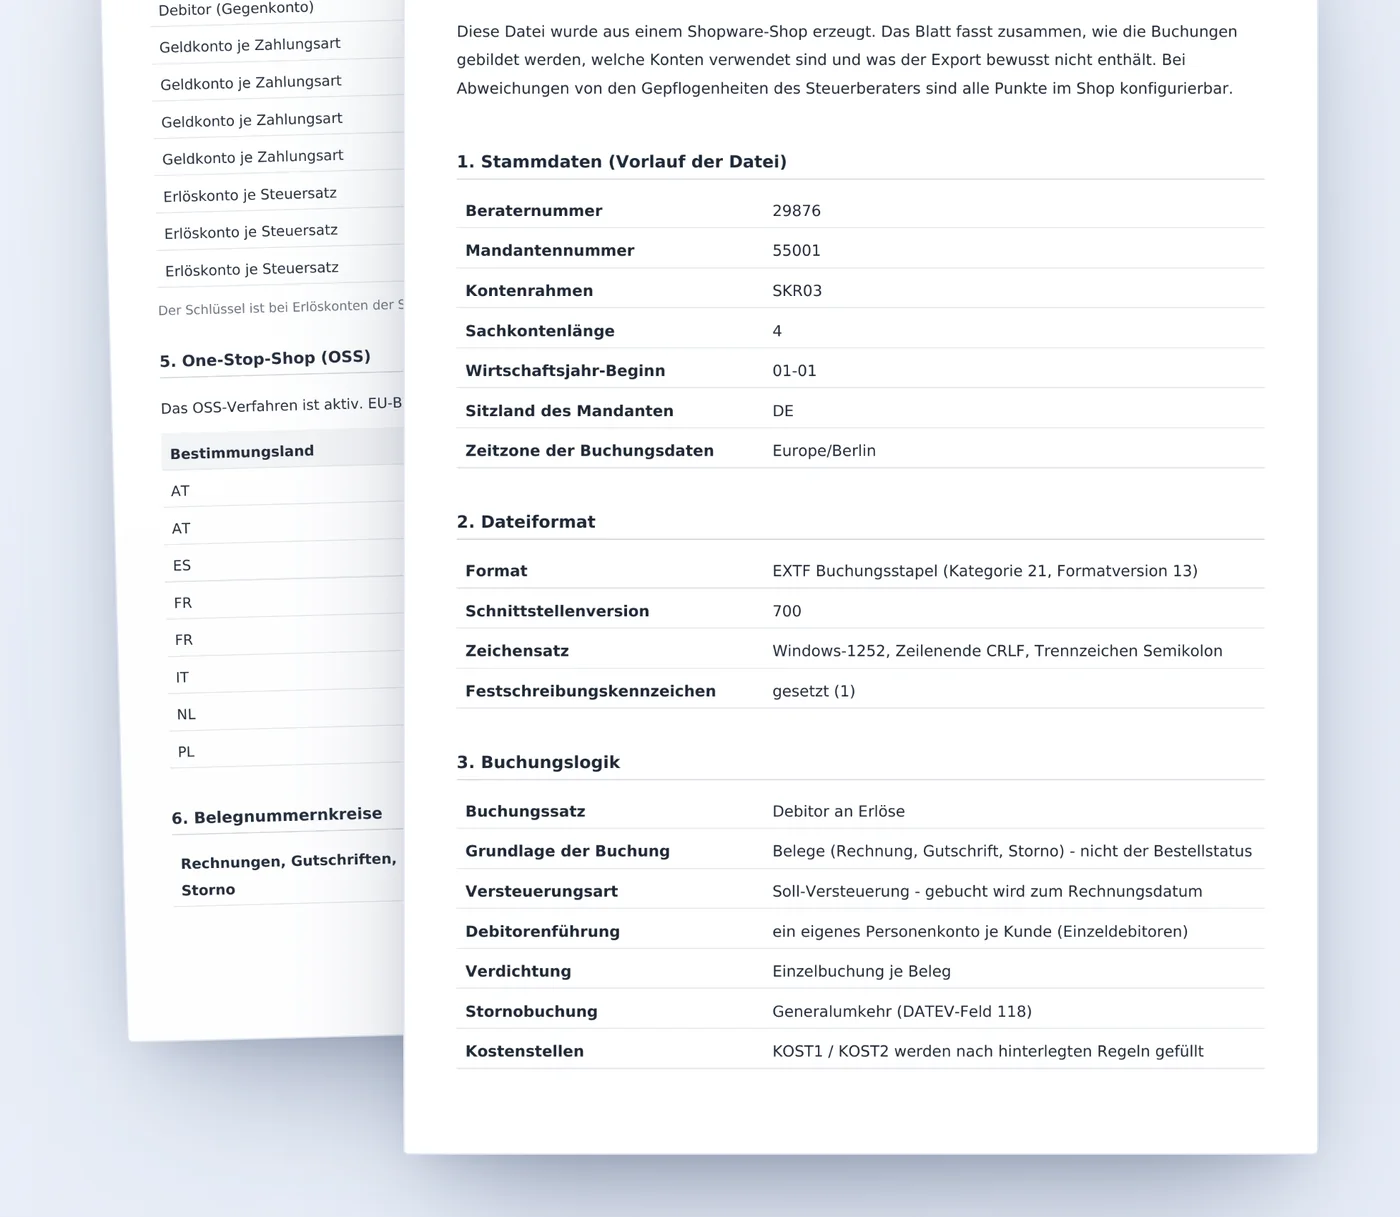
Give the tax firm the booking batch of the test export and the handout - the Advisor info sheet (PDF) link is on the Export page. The firm imports on a trial basis and reconciles; the handout (in German, like the DATEV files) explains every convention of the file, from the header to the order of the import. The document packages come with the first binding export.
Once the test is agreed, you switch on the automatic export on the Export tab and set rhythm and hour - daily, weekly or monthly, in the tenant's time zone - plus the tax firm's email address. From then on the handover runs by itself; the history shows every run with its files.

What a tenant is, the five-step assistant and when you need several.
Revenue, cash, shipping and voucher accounts, the four ways to the debtor and the cost centres.
Period, preview, test export and export, the running run and the history.
Errors that stop and notices that do not - and the way to fix each one.
Every setting on the tenant and the global switches, with default and effect.
Booking batch, general reversal, freeze and the other words from DATEV and Shopware.